Two best friends, baking and blogging across the miles

Monday, February 28, 2011

A is for Apple Muffins!

I found the recipe for these muffins on Finding Joy in My Kitchen. I followed the recipe (except for swirling in some honey when I stirred in the apples)but I'll share it here for convienience sake.


Topping
2 tablespoons brown sugar1/2 tsp cinnamon
Dry1 C whole wheat flour 1 C all purpose flour1 tsp baking soda1/2 tsp salt
Wet

3/4 C brown sugar
1 cup apple sauce
1 egg
1 tsp vanilla
1 cup buttermilk, I used 1 cup of milk mixed with 1 tsp vinegar
1 choppped apple, I used gala

Mix wet and dry ingredients in seperate bowls and then combine. Stir in apples.Fill muffin wells and then sprinkle with topping.  Bake at 375F for 23 minutes. I got 18 muffins from this recipe.


The muffins turned out to be smaller than I expected but, I actaully like this size because I can easily eat them for dessert or a small snack.
Lu's Challenge: Your challenge is to make something that starts with the letter B! That could be banana something or other, bread pudding, butterscotch whatchamacallit, butter cookies, breadsticks, blondies, black bean brownies,  brittle, baked alaska, banoffe pie, butter rum thisorthat, baklava, blackberry cobbler, biscotti, black forest triffles, buttermilk vanilla bean cake,  bourbon doused goodness, blueberry thingies or whatever else you think of- just make it start with B! Good luck, and I await my next challenge :)

Monday, February 14, 2011

Valentine's Baking

I've been wanting to make a lemony baked good since Christmas when my mother in law gave me a lemon cake scented candle.
The culprit....uh inspiration

But, with no one to bake for I've had to wait awhile so I could send Mike off to work with cookies in celebration of Valentine's Day. To celebrate I decided on Lemon White Chocolate Chip Butter Cookies and Peanut Butter Thumbprint Cookies. The lemon cookies satisfy my lemon craving (although I am still trying to talk my husband into letting me get a dwarf lemon tree) and the peanut butter cookies are easy to make and even easier to "valentine up", by making the jam thumbrint into a heart shape.

White Chocolate Butter Cookies- recipe adapted from Piece of Cake

1 cup unsalted butter, cut into tablespoons, at room temperature
3/4 cup sugar
1 teaspoon salt
1 teaspoon light corn syrup
2 tablespoons and 1 teaspoon lemon juice
2 large egg yolks
2 cups spooned and leveled all-purpose flour
1 cup white chocolate chips

1. Cream together the butter, sugar, salt, cornsyrup and lemon juice until creamy.
2. Add the egg yolks one at a time, beating between them.
3. Beat in the flour
4. Stir in white chocolate chips.
5. Shape dough into a disc and divide into 4 pieces.
6. Roll each piece into a log, about 2 inches around. Wrap each log and refrigerate overnight, or at least two hours. I let two rolls sit in the fridge overnight and froze the other  two rolls.
7. When you're ready to bake preheat oven to 375. Slice each log into 12 cookies and place on baking sheet 1 inch apart. Keep the remaining dough cold while the first sheet bakes for about 15 minutes. Rotate the baking sheet halfway throught. Let cool two minutes before transferring to wire rack.

Makes 4 dozen.

Ready for the oven

White chocolate is the my least favorite type of chocolate, and I don't often opt for lemon flavored desserts, but this combination sounded intriguing enough to try. But, I burnt them so I wasn't able to get the full effect of thier goodness. It turned out to be more of a "grilled lemon white chocolate butter cookie". I'd recommend shortening the time to 10-12 minutes or reducing the temp- and make sure to put the cookies on parchment paper!

Peanut Butter Heartprint Cookies

1 cup peanut butter
1 egg
1 1/3 cups sugar or splenda
1 tsp vanilla extract
Jam

Combine with a spoon. Press into small round disks. Use fingers to make heart shaped indentions in the center. Bake 12 minutes at 350F.  Let cool some before moving to wire rack.

I love peanut butter cookies, but I'd never tried the thumbprint kind. The February edition of  Martha Stewart Living suggested that you can make almost any cookie into a thumprint style cookie, and recommended making heartprints for Valentine's day. Some recipes I looked at for thumbrint cookies suggested baking the jam into the cookies and others suggested adding the jam after. But I didn't get to find out which method worked best because in the first batch the thumbprints came out of the dough, so I opted to make them all the same. Oh well, they still tasted fabulous

Did you make any goodies for Valentine's Day?

Monday, February 7, 2011

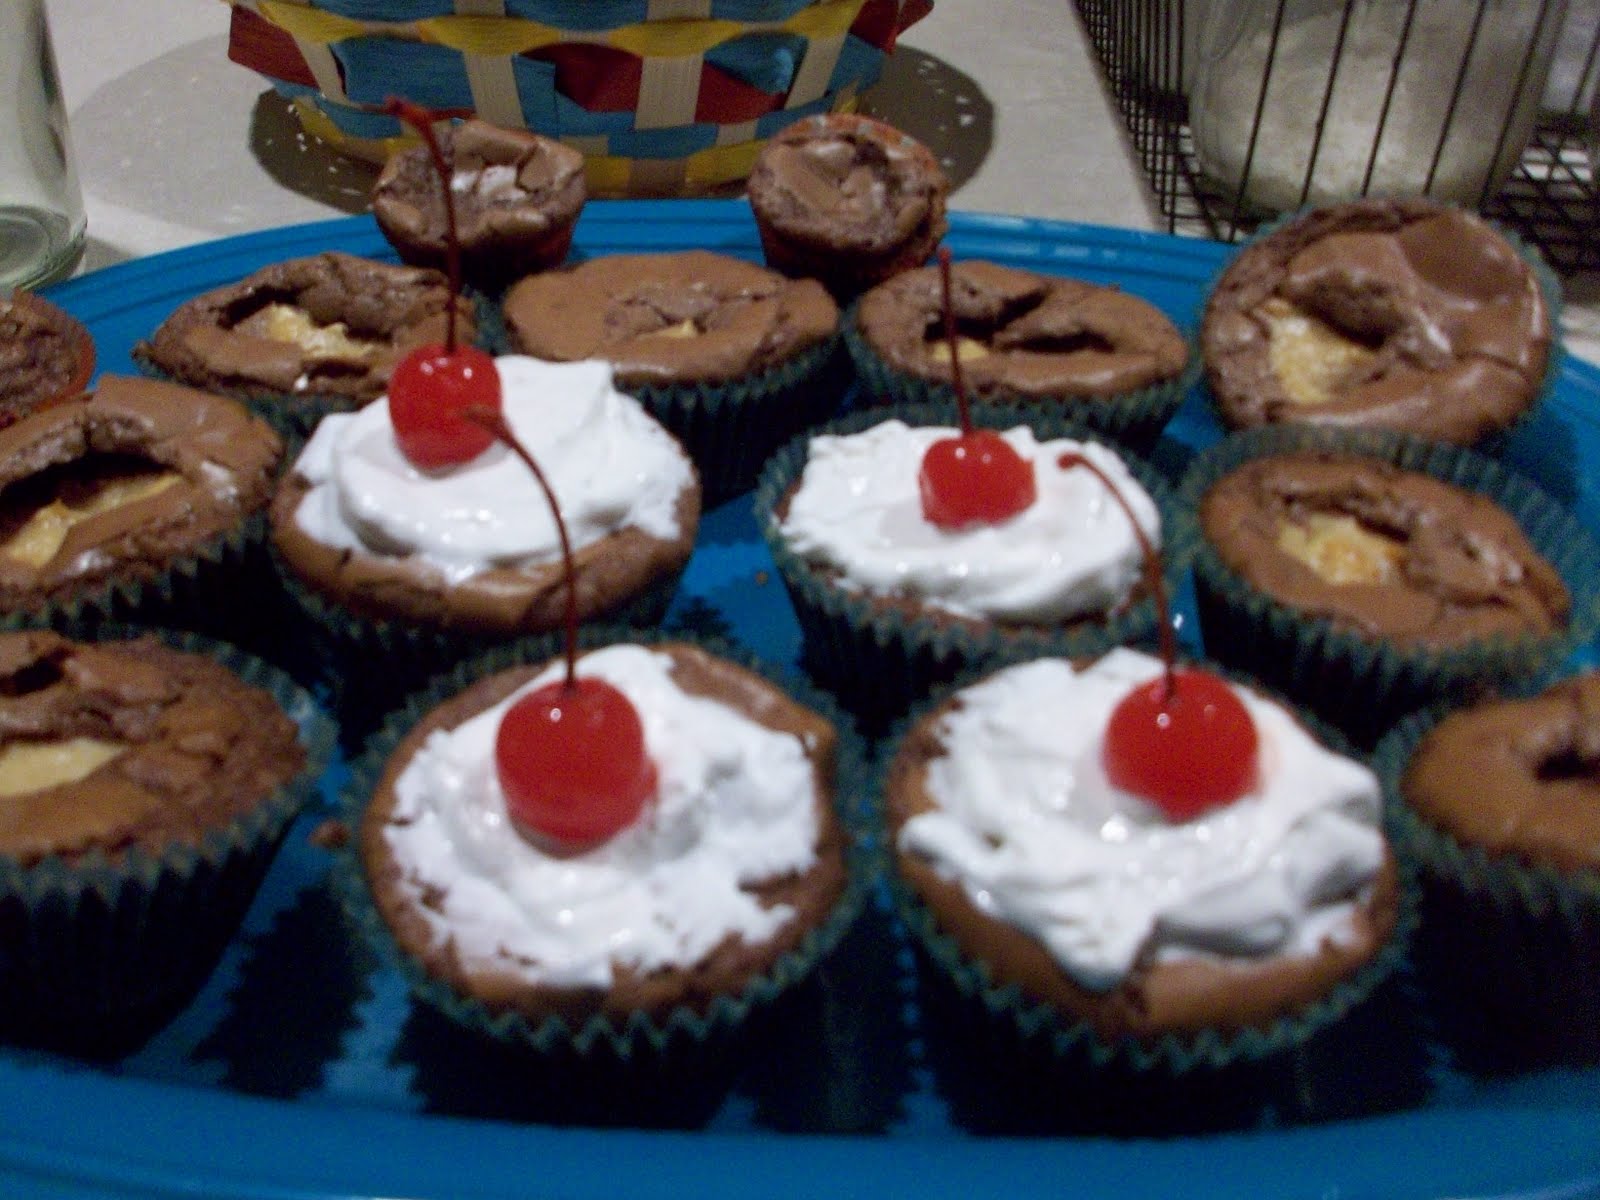
I don't want kids...but I sure do love these Peanut Butter Cheesecake Brownie Babies!


I decided to make these Peanut Butter Cheesecake Brownie Babies at the most ironic time, as the Boyfriend and I recently started a healthy lifestyle kick. Really, trying anything of that sort while still in college in irony enough...Anyhoo, peanut butter is sadly not included on the healthy food list, but these brownie babies were so delicious they lured us back to our days of unhealthy but happy eating (the diet lasted like 2 days so whatever).


My roommate, who also very much enjoys baking, gave me a great tip about measuring peanut butter: spraying the measuring cup with baking spray so that it would be easier to scoop out. Amazing! I don't know why I never thought of it before, and it may seem like common sense but it was still pretty useful. This girl is full of some pretty nifty tips.

My favorite part of the process was mixing the peanut butter and cream cheese. My friends are always commenting that I use cream cheese in a lot of things, but it just makes everything better! I will say that I got a bit lazy at the end, so while the majority of the brownie babies were a spoonful of the peanut butter cream cheese mix into the middle of the brownie batter, the last few were all of it mixed in together. Definitely not as tasty as biting into the filling.

Yummy mixture!

One thing I would leave out in the future is the cool whip topping. It wasn't really necessary and was a little too much sugar for my taste. The cherries were fun to have though. They brownie babies were a hit, and they gave me a reason to use my cute new cupcake liners! I'll definitely try to make them again.

My roomie modeling with the cupcake liners!


Ingredients:
-1 pkg. (19 to 21 oz.) brownie mix (13x9-inch pan size)
-1 pkg. (8 oz.) PHILADELPHIA Cream Cheese, softened-1/3 cup sugar
-1 egg
-1/4 cup peanut butter
-1/2 tsp. vanilla
-1-1/2 cups thawed COOL WHIP Whipped Topping
-20 maraschino cherries

Directions:
HEAT oven to 350ºF.PREPARE brownie batter as directed on package. Spoon into 20 paper-lined muffin cups.BEAT cream cheese, sugar, egg, peanut butter and vanilla with mixer until blended. Spoon 1 rounded Tbsp. into center of batter in each cup, pressing down slightly into batter. Bake 30 min. or until centers are set. Cool. SERVE topped with COOL WHIP and cherries.

Friday, January 28, 2011

Ooey Goey Butter Cookies

This wasn't a challenge but I made them for two ladies at Mike's work so I thought I'd share. It's a Paula Deen recipe (of course it is! it's got butter in the name!) I doubled the recipe and made around 70 cookies, but I'm giving you the recipe for a single batch

okay, they don't look so attractive in big ziploc bags but I promise they taste good


Ingredients:

1 tsp vanilla
powdered sugar
1- 18 oz box of moise chocolate cake mix (I used Butter Fudge Cake mix by Duncan Hines the first time and Super Moist Triple Chocolate by Betty Crocker this time)
1- 8 oz brick of room temperature cream cheese
1 egg
1 stick room temperature butter

Steps:

1. Beat cream chz and butter until smooth.
2.Beat in the egg.
3. Beat in vanilla.
4. Beat in cake mix.
5.Cover and refrigerate for 2 hours.
6. Preheat oven to 350F. Roll into tablespoon sized balls.
7. Roll balls in powdered sugar. Place 1.5 inches apart on a greased/sprayed pan.
8. Cook for 13 minutes. Sprinkle with more powdered sugar if desired.


9. Clean up the late night kitchen mess:


The results?

They were just as fabulous as I remembered! I portioned away ten or so for us to have at home and they're almost all gone.

Thursday, January 20, 2011

Pound Cake is Pinished

Why the "P"? My husband and I have a standing "joke", where we pronounce the "F" in "finished", as a "P", because that's how they said it in the  Gilette commericals we watched in South Korea. And, I like alliteration so pinished it is.


It took me awhile to find a pound cake recipe I wanted to try. I didn't want to make a pound cake that required anything beyond the basic ingredients because of our tight budget, so that ruled out the sour cream and lemon versions of pound cake. I'm also trying to make our milk last the rest of the week and plan on using it in a few more dishes, so I was excited when I stumbled upon a recipe that didn't use much milk, and was followed by content that suggested that milk is left out of a traditional pound cake (and baking powder). Can anyone back this up?

Anyway, I found this recipe on thefreshloaf.com and topped it off with a peanut butter glaze that I found while searching grouprecipes.com.

CAKE

 Ingredients:

1 C butter
2 C sugar
2 1/4 cups flour
1/2 tsp baking powder
1/2 tsp salt
1/4 C milk
5 eggs
1 tsp vanilla

Instructions:
1. Preheat to 300F. Greaseand flour your pan
2. Cream butter and sugar.
3. With a wooden spoon, mix in the flour baking powder and salt.
4. Add milk slowly while stirring
5. Add the eggs one at a time, and mix well with the wooden spon between each egg
6. Mix in the vanilla and pour into the pan
7. Bake for 1 hour and 15 minutes

GLAZE

Ingredients:

1/2 C PB
1/2 C Powdered sugar
3/4 cup milk
1 tsp vanilla
2 Tbsp cream cheese

Instructions:

1. Whisk together all three ingredients until the mixture is smooth and lump free.
2. Add milk by the tablespoon until it is thin enough to drizzle.
3. Drizzle over cooled cake.

The Results?

I made three mini cupcakes so that I could taste the cake and make sure it was okay for Mike to take with him to work. The rest of the pound cake batter went into a loaf pan.  I think that was my mistake. Everything but the middle of the top was done in the hour and 15 minutes. So, I turned the oven down to let the middle cook with out burning the outside. Afterwards, I read that if you bake in glass pan to adjust the temp. down by 25 degrees.


It looked a little dry on the two ends but the rest of it looked okay so I gave it  a generous amount of the glaze- which was a headache all on its own.


But, the mini cupcakes were light and fluffy and yummy, so next time I make pound cake it just might be cupcakes- which was my gut instict this time since my FREE cakepans hadn't showed up yet, but then I saw the loaf pan, and thought hey, why not. And of course my cake pans arrived this afternoon!


I used the "chunky" glaze for my cupcakes

About the glaze, I couldn't get the cream cheese  to blend into everything else, so I tried stirring the mixture over a burner on low but after 15 minutes I gave up on that and strained the cream cheese chunks out of the glaze. It tasted fine, so onto the cake it went. I recommend maybe trying to cream the pb and sugar and cream cheese together first, and then add the milk and maybe it will mix in better.


What's next? Well, I know Luisa probably has something up her sleeve that she'd like me to try, but first I'd like to make something lemony. I'm not sure what yet.  My mother in law gave me a lemon cake candle for Christmas and that thing smells so good I'd almost consider eating it. So, with the lemon candle as my inspiration, I shall go forth and find you a delicious lemony recipe!

Wednesday, January 19, 2011

Key Lime Pie Cupcake Extravaganza!


The Backstory:
This past weekend I had the perfect opportunity to take on my first baking challenge. Ever since he moved into his new apartment here on campus, The Boyfriend has had this intense urging to throw a house(apartment?)warming party. His friends all have very eager appetites (understatement), so I figured what better opportunity than this one to have my food experiment. One concern I had to begin with was that the recipe requires quite a number of different ingredients, which can be a bit stressful to those on a budget who can't really afford to get a number of things that they may only use just once. Luckily, I already some of the things I needed. However, I also made a couple of personal changes. For one, I opted out of the coconut flavoring, just because it was ridiculously priced at Food Lion and The Boyfriend suggested it may not make a significant difference...Maybe if I redo it I'll try to throw that in, but they were delicious regardless. Secondly, while the recipe suggests blackberry jam for the frosting, I decided to go with strawberry fruit preserves. Strawberry just sounded like it would go deliciously with the lime flavoring, and as The Boyfriend mentioned, that combination seems to work just peachy in mixed drinks, so I went with it. Anywho, with those suggestions in mind, here's the recipe below:

Ingredients:
1 tsp lime zest
2 tbs lime jce
1 lg egg
3 lg egg yolks
1 white cake mix
1 pkg (3oz)vanilla instant pudding
1 1/4 c water
1/3 cup oil
1 tsp coconut flavoring
1 can sweetened condensed milk
1/3 cup key lime juice
2 (8oz) pkg cream cheese
1/2 stick of butter
2 lg spoonfuls of blackberry jam
powdered sugar 3 to 4 cups

Directions:
1) Put the whole egg and yolks, cake mix, pudding(dry),water,
oil, coconut flavoring, zest, 2table j
uice. mix for 2 to 3 min. spoon into cupcake liners. bake app 15 to 18 min at 350. cool 5 min.
2) Make the filling of sweetened condensed milk and lime juice. Stir until thickened and squeeze some into each cupcake from the top. Cool.
3)Prepare the cream cheese frosting. add the jam to your liking. spread on top.


How It All Turned Out:
The cupcakes turned out amazingly, but with a few bumps. First of all, I accidently confused the fact that the butter was supposed to be for the frosting and not the batter...so the cupcakes themselves were a bit more chewy than expected. Also, the tops caved in a few minutes after taking them out to cool :( My roommate, who is also very into baking, mentioned that overmixing the batter sometimes causes the caving effect, so in all I learned two things: Pay attention to the order of the ingredients, and don't overmix!!

Slightly overmixed batter...woops!

Mixing the filling was easy enough, but another difficulty was figuring out how to actually put it into the cupcakes. I don't have a cupcake plunger, but Rachel mentioned that she sometimes uses a peeler to carve out the sections in the middle of the cupcakes to put the filling in. I did the same, and while it wasn't exactly neat it got the job done, and I had plenty of willing subjects (my lovely roommates) to eat the cupcake bits for me. I covered the holes with the frosting, which was my favorite part, and voila! The strawberry jam was definitely a good choice, and definitely don't leave out the lime zest, as it added a really nice effect. I got great reviews from The Boyfriend's very hungry and slightly tipsy friends that were at the party, but happily my more sober friends also loved them. I kept reminding everyone to take very big bites to get the full effect of the filling and the frosting together. All in all, a slightly difficult but very rewarding experience. I've already gotten demands for more and will repeat very soon!

As for my next challenge, I'm hoping for something involving peanut butter...I've had an immense craving and can't wait to see what Rach comes up with for me!

Wednesday, January 12, 2011

A Bit About Us

Luisa and Rachel have been friends since 11th grade and have managed to grow their friendship through their college years, despite frequent and, often, vast distances between them. Absence makes the heart grow fonder, I guess.

Luisa is finishing her last semester of college in the 'burg and has hopes of attending gradschool after graduation. Currently, she works as a tutor and has a super hot comedian boyfriend.

Rachel is a newlywed who graduated in December , also from a college in the 'burg, with a degree in Creative and Professional Writing. Currently, she is pounding the pavement in small town PA.

Both Luisa and Rachel love to bake, and according to Lu's mother, need to learn to cook so that they can feed their men more than baked yummies.

Hotglue Baking is their outlet for continuing to exploring the world of baking together even though they are 9 hours apart.

Luisa's first challenge? Key Lime Pie Cupcakes!

Rachel's first challenge? Glazed Pound Cake!

To the kitchen, ladies!